<!-- Ouput directory for the build --> <Option Name="BuiltDirectory" DefaultValue="$(RootDir)/LocalBuilds/Engine" Description="Directory for outputting the built engine"/>
<!-- The local output directory --> <Property Name="LocalInstalledDir" Value="$(BuiltDirectory)/Windows"/> <Property Name="LocalInstalledDirMac" Value="$(BuiltDirectory)/Mac"/> <Property Name="LocalInstalledDirLinux" Value="$(BuiltDirectory)/Linux"/>
///<summary> /// Build all the modules that are valid for this target type. Used for CIS and making installed engine builds. ///</summary> [CommandLine("-AllModules")] publicbool bBuildAllModules = false;
New: Added a -nolink command line option for Unreal Build Tool, which enables compiling a target without linking it. This is useful for automated build tests, such as non-unity compiles.
///<summary> /// Attempts to get the SSH private key from the standard locations ///</summary> ///<param name="OutPrivateKey">If successful, receives the location of the private key that was found</param> ///<returns>True if a private key was found, false otherwise</returns> privateboolTryGetSshPrivateKey(out FileReference OutPrivateKey) { // Build a list of all the places to look for a private key List<DirectoryReference> Locations = new List<DirectoryReference>(); Locations.Add(DirectoryReference.Combine(DirectoryReference.GetSpecialFolder(Environment.SpecialFolder.ApplicationData), "Unreal Engine", "UnrealBuildTool")); Locations.Add(DirectoryReference.Combine(DirectoryReference.GetSpecialFolder(Environment.SpecialFolder.Personal), "Unreal Engine", "UnrealBuildTool")); // ... }
privateboolTryGetSshPrivateKey(out FileReference OutPrivateKey) { // Build a list of all the places to look for a private key List<DirectoryReference> Locations = new List<DirectoryReference>(); DirectoryReference ApplicationData = DirectoryReference.GetSpecialFolder(Environment.SpecialFolder.ApplicationData);
Reading local file list from C:\BuildAgent\workspace\FGameEngine\Engine\Engine\Saved\BuildGraph\Update Version Files\Tag-Update Version Files.xml Running: C:\BuildAgent\workspace\FGameEngine\Engine\Engine\Binaries\DotNET\UnrealBuildTool.exe UnrealHeaderTool Mac Development -NoUBTMakefiles -nobuilduht -precompile -allmodules -Manifest=C:\BuildAgent\workspace\FGameEngine\Engine\Engine\Intermediate\Build\Manifest.xml -NoHotReload -log="C:\BuildAgent\workspace\FGameEngine\Engine\Engine\Programs\AutomationTool\Saved\Logs\UBT-UnrealHeaderTool-Mac-Development.txt" [Remote] Using remote server 'xx.xx.xx.xx' on port 2222 (user 'buildmachine') [Remote] Using private key at C:\BuildAgent\workspace\FGameEngine\Engine\Engine\Build\NotForLicensees\SSHKeys\xx.xx.xx.xx\buildmachine\RemoteToolChainPrivate.key ERROR: Unable to determine home directory for remote user. SSH output: Host key verification failed. Took 0.6103776s to run UnrealBuildTool.exe, ExitCode=6 UnrealBuildTool failed. See log for more details. (C:\BuildAgent\workspace\FGameEngine\Engine\Engine\Programs\AutomationTool\Saved\Logs\UBT-UnrealHeaderTool-Mac-Development.txt)
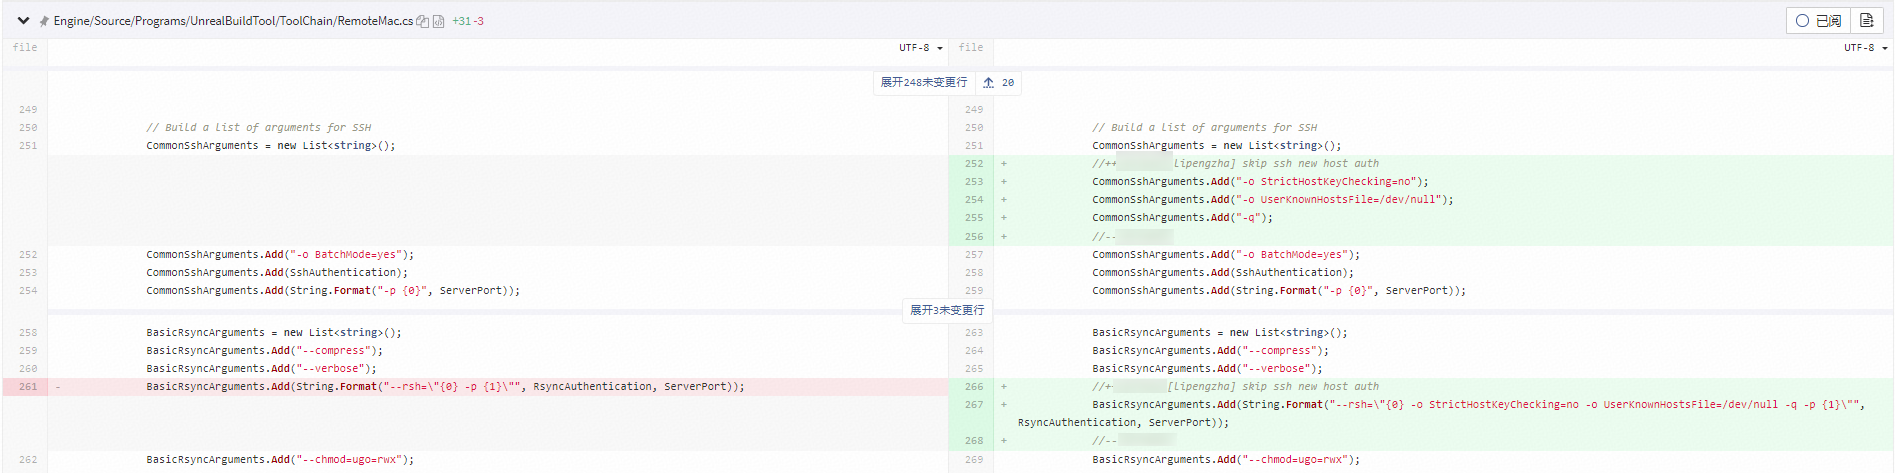
classRemoteMac { // ... ///<summary> /// The authentication used for SSH (probably similar to RsyncAuthentication). ///</summary> [XmlConfigFile] privatestring SshAuthentication = "-i '${CYGWIN_SSH_PRIVATE_KEY}'"; // ... };
// Build a list of arguments for SSH CommonSshArguments = new List<string>(); CommonSshArguments.Add("-o BatchMode=yes"); CommonSshArguments.Add(SshAuthentication); CommonSshArguments.Add(String.Format("-p {0}", ServerPort)); CommonSshArguments.Add(String.Format("\"{0}@{1}\"", UserName, ServerName)); // ... }
$ Engine\Extras\ThirdPartyNotUE\DeltaCopy\Binaries\ssh.exe -p 22 buildmachine@ 192.168.1.123 The authenticity of host '[ 192.168.1.123 ]:22 ([ 192.168.1.123 ]:22)' can't be established. RSA key fingerprint is e0:8d:b9:7c:65:c7:9e:18:94:12:ed:ef:40:1a:15:47. Are you sure you want to continue connecting (yes/no)? yes Warning: Permanently added '[ 192.168.1.123 ]:22' (RSA) to the list of known hosts. Password:
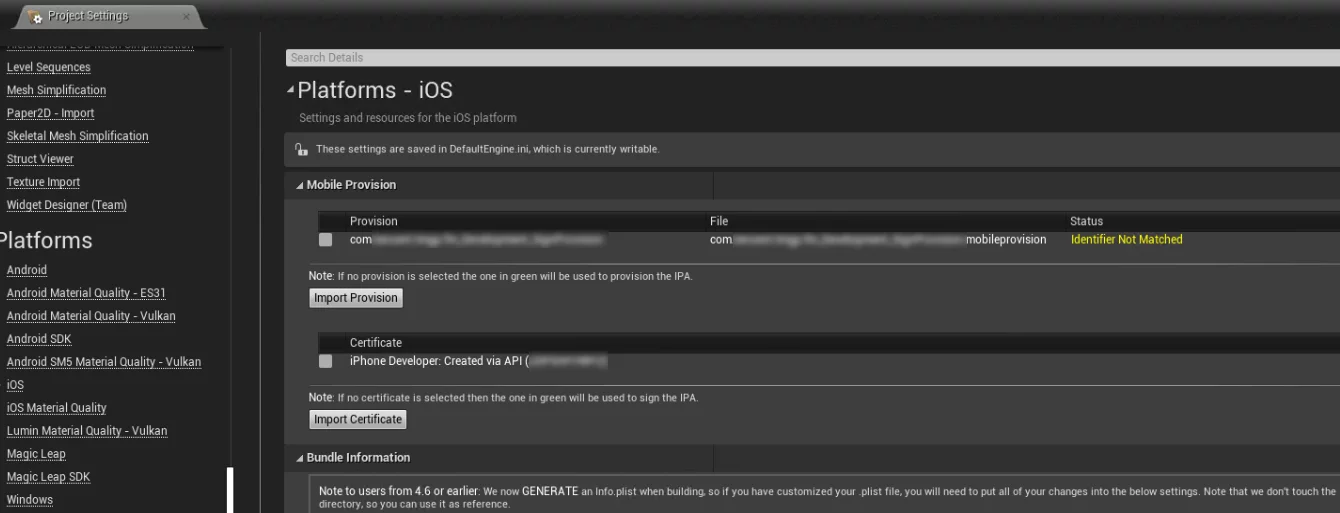
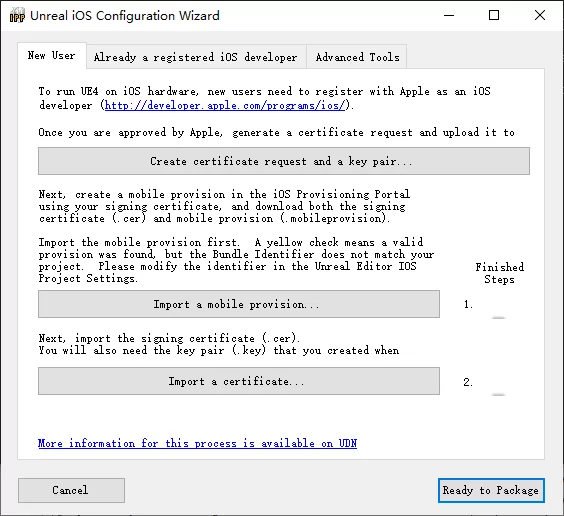
Reading local file list from C:\BuildAgent\workspace\FGameEngine\Engine\Engine\Saved\BuildGraph\Compile UnrealHeaderTool Mac\Tag-Compile UnrealHeaderTool Mac.xml Reading local file list from C:\BuildAgent\workspace\FGameEngine\Engine\Engine\Saved\BuildGraph\Update Version Files\Tag-Update Version Files.xml Reading shared manifest from C:\BuildAgent\workspace\FGameEngine\Engine\Engine\Saved\BuildGraph\Compile UnrealHeaderTool Mac\Manifest.xml Running: C:\BuildAgent\workspace\FGameEngine\Engine\Engine\Binaries\DotNET\UnrealBuildTool.exe UE4Game IOS Development -NoUBTMakefiles -nobuilduht -precompile -allmodules -nolink -nodebuginfo -Manifest=C:\BuildAgent\workspace\FGameEngine\Engine\Engine\Intermediate\Build\Manifest.xml -NoHotReload -log="C:\BuildAgent\workspace\FGameEngine\Engine\Engine\Programs\AutomationTool\Saved\Logs\UBT-UE4Game-IOS-Development.txt" [Remote] Using remote server 'xx.xx.xx.xxx' on port 22 (user 'buildmachine') [Remote] Using private key at C:\BuildAgent\workspace\FGameEngine\Engine\Engine\Build\NotForLicensees\SSHKeys\10.75.27.129\buildmachine\RemoteToolChainPrivate.key [Remote] Using base directory '/Users/buildmachine/UE4/Builds/lipengzha-PC2' ERROR: Unable to find mobile provision for UE4Game. See log for more information. Took 4.0300959s to run UnrealBuildTool.exe, ExitCode=6
Reading local file list from C:\BuildAgent\workspace\FGameEngine\Engine\Engine\Saved\BuildGraph\Compile UnrealHeaderTool Mac\Tag-Compile UnrealHeaderTool Mac.xml Reading local file list from C:\BuildAgent\workspace\FGameEngine\Engine\Engine\Saved\BuildGraph\Update Version Files\Tag-Update Version Files.xml Reading shared manifest from C:\BuildAgent\workspace\FGameEngine\Engine\Engine\Saved\BuildGraph\Compile UnrealHeaderTool Mac\Manifest.xml Running: C:\BuildAgent\workspace\FGameEngine\Engine\Engine\Binaries\DotNET\UnrealBuildTool.exe UE4Game IOS Development -NoUBTMakefiles -nobuilduht -precompile -allmodules -nolink -nodebuginfo -Manifest=C:\BuildAgent\workspace\FGameEngine\Engine\Engine\Intermediate\Build\Manifest.xml -NoHotReload -log="C:\BuildAgent\workspace\FGameEngine\Engine\Engine\Programs\AutomationTool\Saved\Logs\UBT-UE4Game-IOS-Development.txt" [Remote] Using remote server '192.168.1.123' on port 22 (user 'buildmachine') [Remote] Using private key at C:\BuildAgent\workspace\FGameEngine\Engine\Engine\Build\NotForLicensees\SSHKeys\192.168.1.123\buildmachine\RemoteToolChainPrivate.key [Remote] Using base directory '/Users/buildmachine/UE4/Builds/lipengzha-PC3' [Remote] Uploading C:\BuildAgent\workspace\FGameEngine\Engine\Engine\Intermediate\Remote\UE4Game\IOS\Development\com.xxxxx.xxxx.xx_Development_SignProvision.mobileprovision [Remote] Exporting certificate for C:\Users\lipengzha\AppData\Local\Apple Computer\MobileDevice\Provisioning Profiles\com.xxxxx.xxxx.xx_Development_SignProvision.mobileprovision... Executing iPhonePackager ExportCertificate C:\BuildAgent\workspace\FGameEngine\Engine\Engine\Source -provisionfile C:\Users\lipengzha\AppData\Local\Apple Computer\MobileDevice\Provisioning Profiles\com.xxxxx.xxxx.xx_Development_SignProvision.mobileprovision -outputcertificate C:\BuildAgent\workspace\FGameEngine\Engine\Engine\Intermediate\Remote\UE4Game\IOS\Development\Certificate.p12 CWD: C:\BuildAgent\workspace\FGameEngine\Engine\Engine\Binaries\DotNET\IOS Initial Dir: C:\BuildAgent\workspace\FGameEngine\Engine\Engine\Source Env CWD: C:\BuildAgent\workspace\FGameEngine\Engine\Engine\Binaries\DotNET\IOS BranchPath = lipengzha-PC3/C/BuildAgent/workspace/FGameEngine/Engine/Engine/Binaries --- GameBranchPath = lipengzha-PC3/C/BuildAgent/workspace/FGameEngine/Engine/Engine/Binaries ---------- Executing command 'ExportCertificate' '' ... Looking for a certificate that matches the application identifier '9TV4ZYSS4J.com.xxxxx.xxxx.xx' .. Provision entry SN '61B440405D86B84D' matched 0 installed certificate(s) .. Failed to find a valid certificate that was in date IPP ERROR: Failed to find a valid certificate ERROR: IphonePackager failed. Took 2.9281688s to run UnrealBuildTool.exe, ExitCode=6
Code Signing Error: No certificate for team '9TV4ZYSS4J' matching 'iPhone Developer: Created via API (JDPXHYVWYZ)' found: Select a different signing certificate for CODE_SIGN_IDENTITY, a team that matches your selected certificate, or switch to autom atic provisioning.
if [ "$4" == "-buildscw" ] || [ "$5" == "-buildscw" ]; then echo Building ShaderCompileWorker... mono Engine/Binaries/DotNET/UnrealBuildTool.exe ShaderCompileWorker Mac Development fi echo unlock mac keychain... security unlock-keychain -p password login.keychain echo Running command : Engine/Binaries/DotNET/UnrealBuildTool.exe "$@" mono Engine/Binaries/DotNET/UnrealBuildTool.exe "$@"
ExitCode=$? if [ $ExitCode -eq 254 ] || [ $ExitCode -eq 255 ] || [ $ExitCode -eq 2 ]; then exit 0 else exit$ExitCode fi
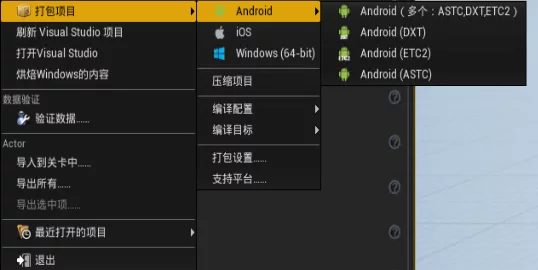
因为编译时会把Build.sh通过RSync传递到Mac上,所以可以看到以下log:
1 2 3 4 5 6 7 8 9 10 11
[Remote] Executing build
  Running bundled mono, version: Mono JIT compiler version 5.16.0.220 (2018-06/bb3ae37d71a Fri Nov 16 17:12:11 EST 2018)
  unlock mac keychain...
  Running command : Engine/Binaries/DotNET/UnrealBuildTool.exe UnrealHeaderTool Mac Development -SkipRulesCompile -XmlConfigCache=/Users/buildmachine/UE4/Builds/lipengzha-PC2/C/BuildAgent/workspace/FGameEngine/Engine/Engine/Intermediate/Build/XmlConfigCache.bin -precompile -allmodules -Log=/Users/buildmachine/UE4/Builds/lipengzha-PC2/C/BuildAgent/workspace/FGameEngine/Engine/Engine/Programs/AutomationTool/Saved/Logs/UBT-UnrealHeaderTool-Mac-Development_Remote.txt -Manifest=/Users/buildmachine/UE4/Builds/lipengzha-PC2/C/BuildAgent/workspace/FGameEngine/Engine/Engine/Intermediate/Remote/UnrealHeaderTool/Mac/Development/Manifest.xml
  Target is up to date
  Deploying UnrealHeaderTool Mac Development...
  Deploying now!
  Total execution time: 1.01 seconds
[Remote] Downloading C:\BuildAgent\workspace\FGameEngine\Engine\Engine\Intermediate\Remote\UnrealHeaderTool\Mac\Development\Manifest.xml
[Remote] Downloading build products
  receiving file list ... done
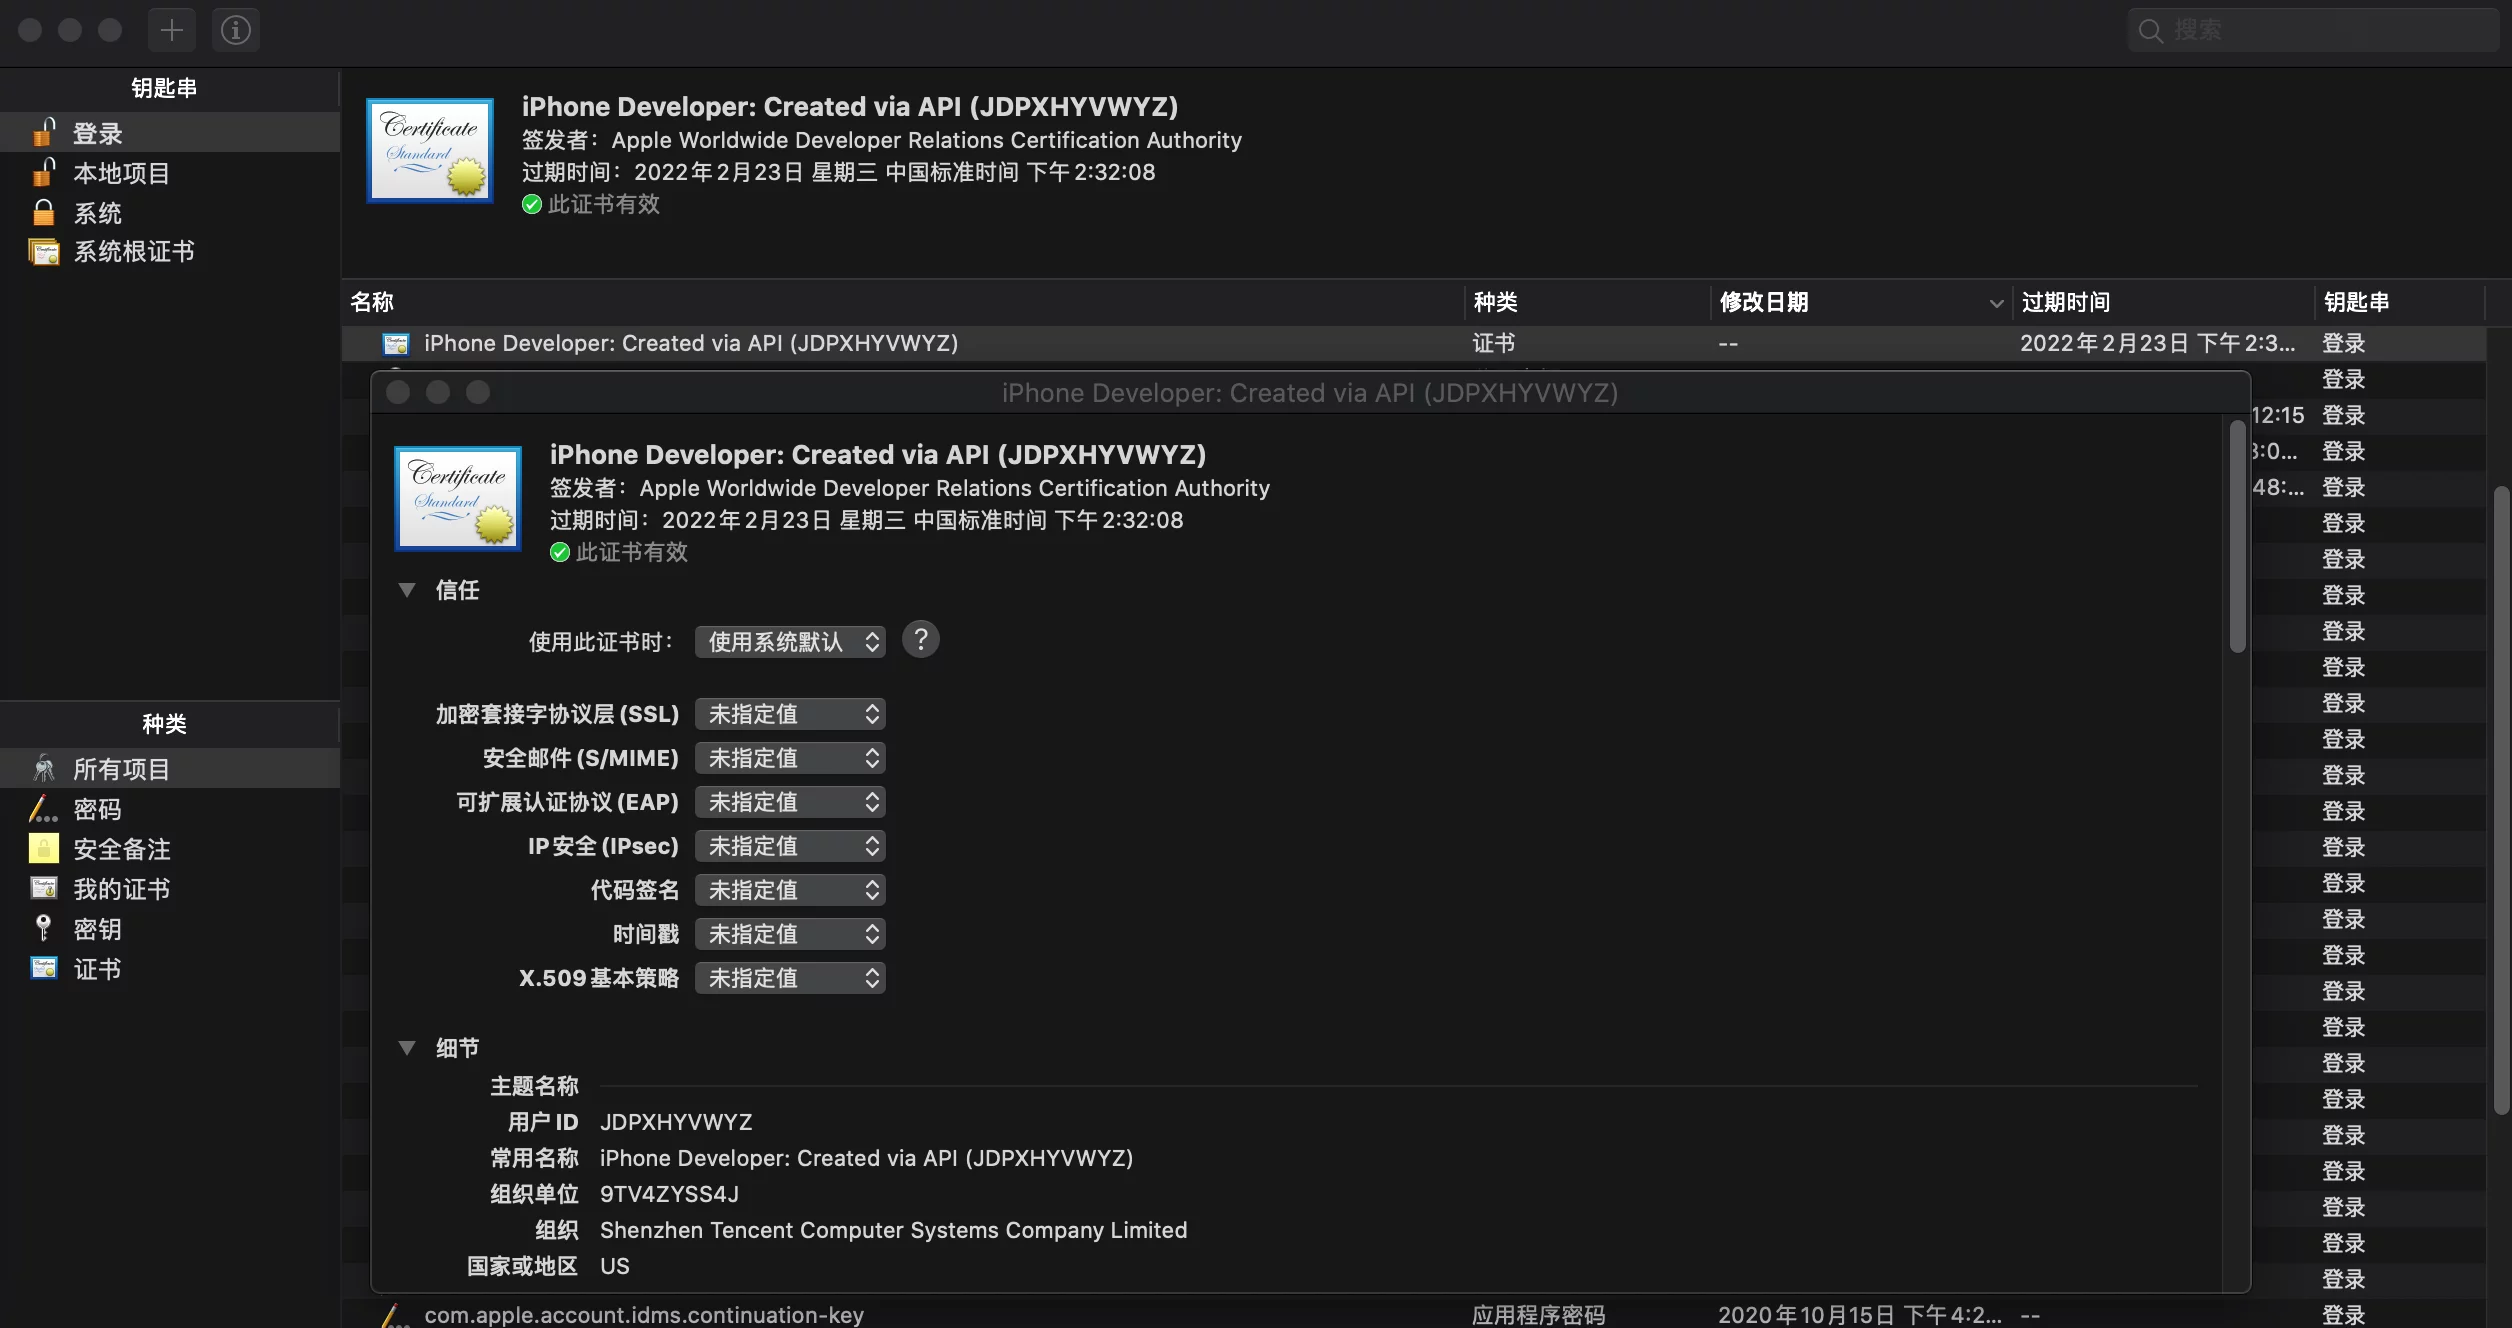
Code Signing Error: Invalid trust settings. Restore system default trust settings for certificate "iPhone Developer: Created via API (JDPXHYVWYZ)" in order to sign code with it.
Code Signing Error: Code signing is required for product type 'Application' in SDK 'iOS 13.6'
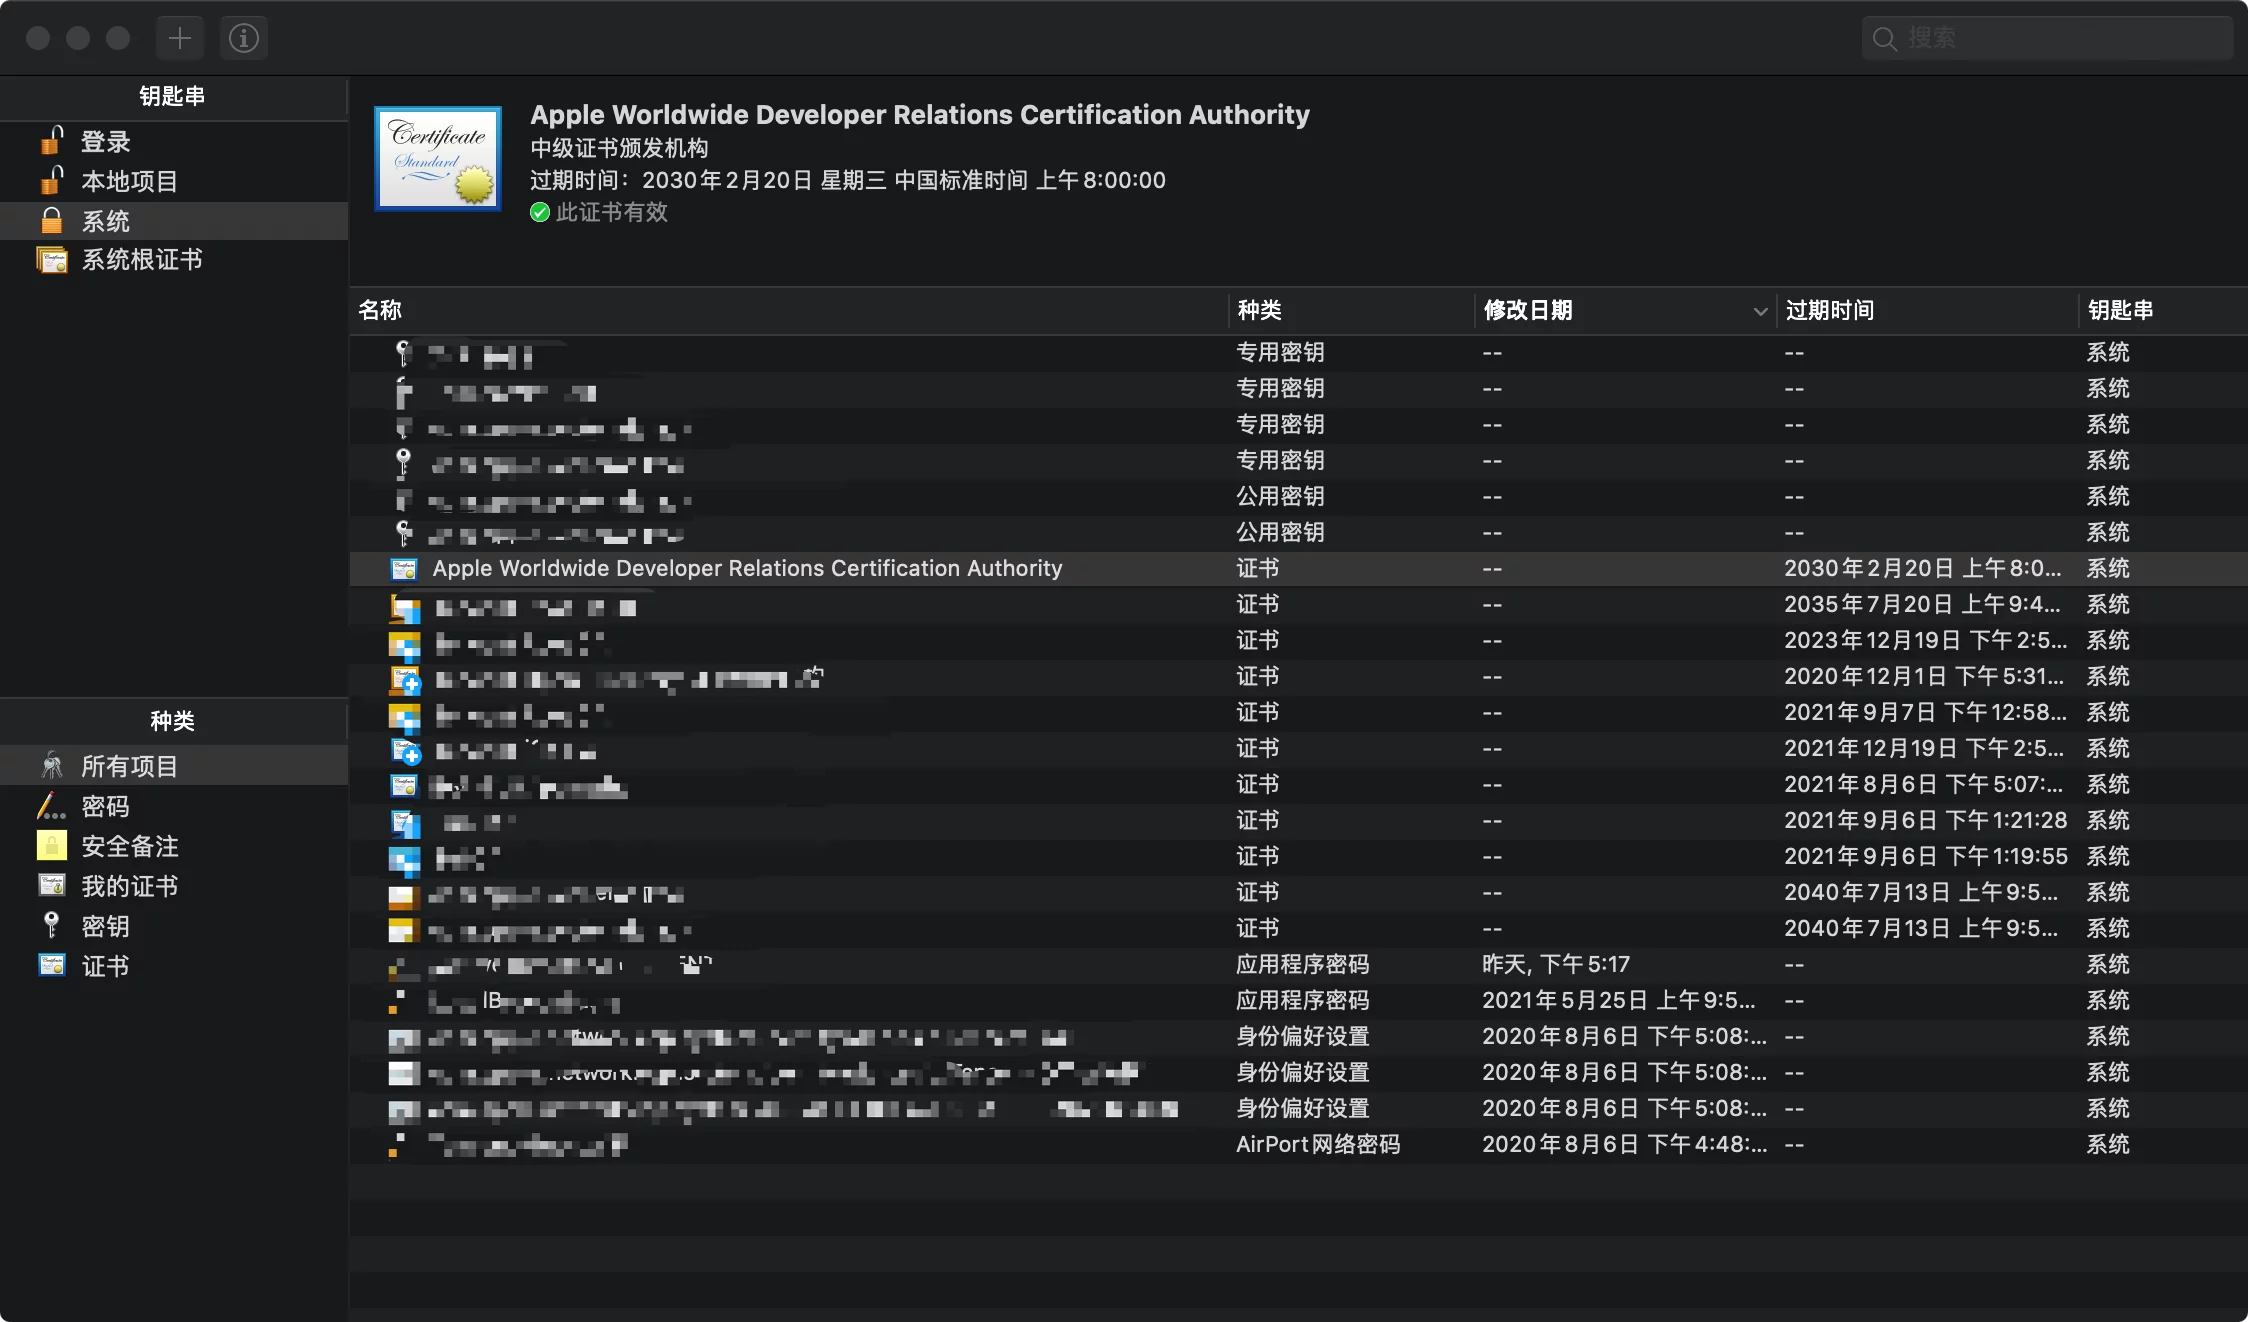
这是因为在Mac上的钥匙串中对证书的设置被修改为了始终信任,修改回使用系统默认即可。
unable to build chain to self-signed root for signer
<!-- Define Editor Filters --> <PropertyName="CopyEditorFilter"> <!-- This assembly is normally embedded into the UBT executable, but it can technically be rebuilt from an installed build --> Engine/Binaries/ThirdParty/Newtonsoft/... Engine/Binaries/ThirdParty/VisualStudio/...